Interaction point and prompts
Put the activation point at the handle, latch or button instead of the geometric center.
Set a hold duration
Move the point directly
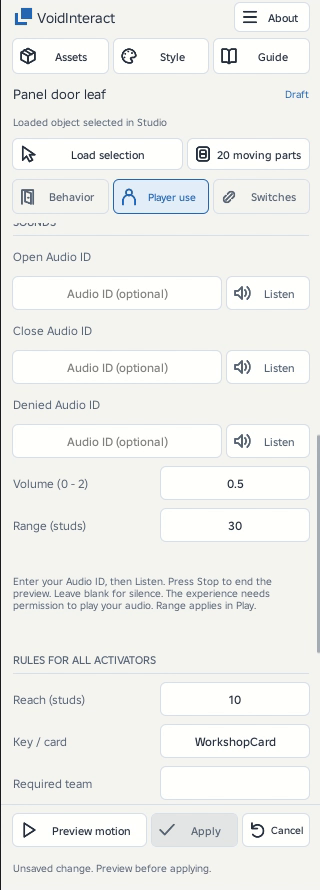
Open Player use. Move edits the prompt anchor with position arrows. Pick surface chooses a point on the moving assembly. Reset returns to automatic front-surface placement. Preview and Apply any changed setting.
Direct activation and reach
Direct interaction can be turned on or off. Reach accepts 3 to 20 studs, measured by the server from the character root to the attachment. Prompts require line of sight by default. The server checks distance and access before allowing activation.
Device-aware feedback
The spatial control follows its attachment and uses your place appearance and input settings. Keyboard shows its configured letter, gamepad uses a Roblox glyph with a labeled fallback, and Touch displays Tap. Layout dimensions depend on the chosen preset and scale. Open, Close, motion and blocked feedback follow server state.
Device support
Prompts provide keyboard, controller and touch layouts. Test your chosen controls on the devices you intend to support.
Camera and primary input
Click the prompt or use its displayed key to activate it. Right-button input remains available for camera control, and a left press while right-dragging does not activate the mechanism. On touch devices, tap the displayed target. Check camera movement and prompt placement with your game’s camera setup.
One mechanism, two sides
Enable Two sides, then choose Front point or Back point before Move, Pick surface or Reset. The automatic positions occupy opposite faces along the assembly bounding box’s thinnest axis. Custom shapes may need explicit placement. Preview and Apply. Both points and any linked button control the same saved mechanism.
Nearby controls and held input
Keyboard and controller focus select one reachable target. Other nearby controls use small marks. The focused target is highlighted. Aim at the intended mechanism before activating. Touch offers separate tap targets. A held key does not activate a new target when focus changes. Release and press again. Names are optional and hidden by default.
See blocked opening for closing from a stopped position and optional auto-resume.
Optional hold to activate
Under Player use → Hold to activate, turn Hold on and choose 1, 2 or 5 seconds, or enter 0.1 to 15 seconds. Turn it off for a single press. This applies to the mechanism and its linked switches.
Every prompt style shows progress inside the key with a pressed effect. Release early to cancel. Keyboard, controller and touch share the same duration.
Optional action sounds
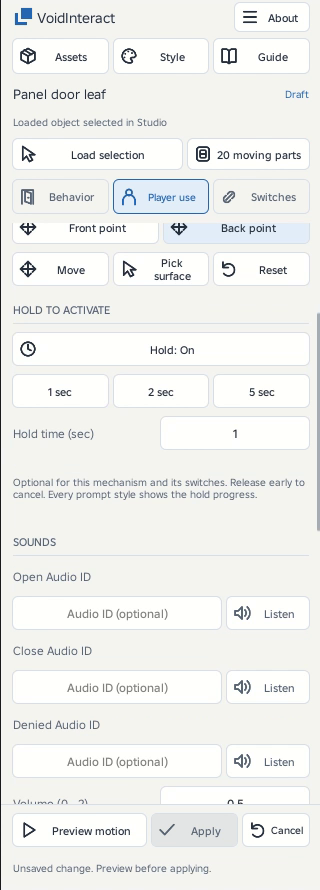
Under Player use → Sounds, enter your own Audio ID for opening, closing or denied access. Lights use On and Off. Leave any ID blank for silence.
Choose Listen beside an ID to hear it before applying. The same button becomes Stop, including while the audio loads. Listening to another ID stops the previous preview. Closing the panel, changing the selected object or leaving Player use also stops it. Previews stop automatically after 60 seconds.
Set Volume for both the preview and the action. Range controls how far away players can hear the sound in Play. If an ID cannot load, check the ID and the experience's audio permissions. Apply your changes, then test the actual interaction in Play.